Provide a third-party warranty option for Refurbished or Used items by batch using a third-party warranty template. (Sellers are not required to provide a warranty with the exception being customized upgraded parts and our standard warranty information is provided on the item page.)
Available platforms: Newegg.com, Neweggbusiness.com, Newegg.ca
How-To:
- Go to Seller Portal and hover your mouse pointer over the list icon (upper left corner) then select Items > Batch Warranty Settings.

- Downloading template:
-
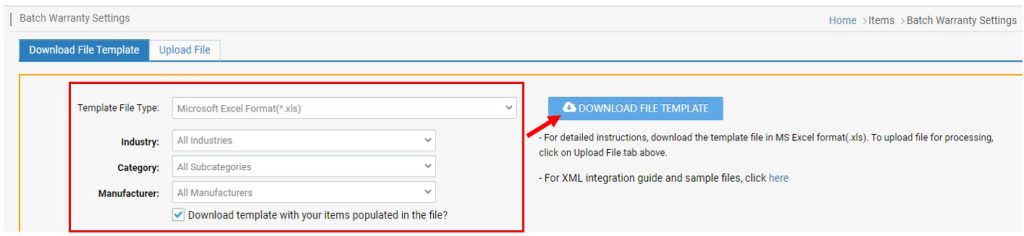
Download File Template tab selected.
-
Select Template File Type:
- For new sellers using data feed templates, we recommend using Microsoft Excel Format, which provides more information such as Instructions, Basic Item Info – Definitions, and/or Detail Item Info – Values sheets.
-
Leave Industry, Category, and Manufacturer to ALL, so all items will be downloaded to the template.
-
By default the checkbox is checked Download the template with your items populated in the file, do not uncheck.
-
Click DOWNLOAD FILE TEMPLATE to submit the request and prepare the template.
- Download File Template Status and History:
- By default, Newegg provides the last 3 days of downloads. Adjust filter accordingly if checking for later days.
-
Click REFRESH LIST to refresh the Status of the download. Periodically click to check status.
-
When Initial Status has changed to Completed under Download Link a link will be available. Click Download and save the template to a local drive.

-
- Updating template:
- Open template:
- Highlighted do not update/modify the column and sheet names, doing so will cause the upload to fail.
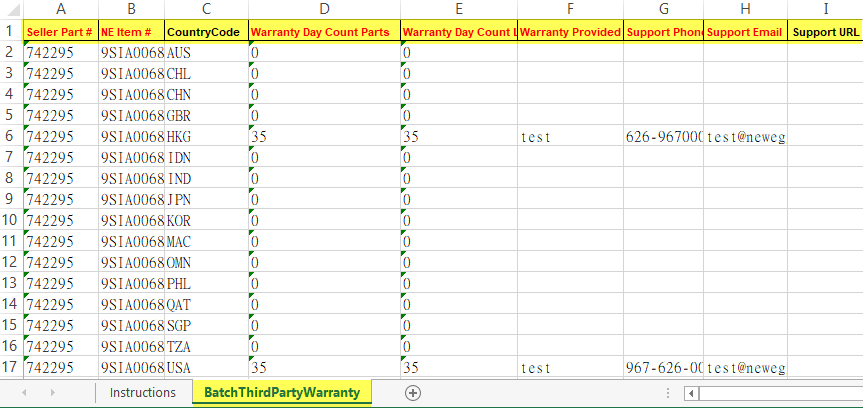
- Update the item(s) Third-party Warranty accordingly.
- Please refer to the Instructions sheet for definitions, accepted value, and requirements.
- Save file.
- Open template:
- Uploading template:
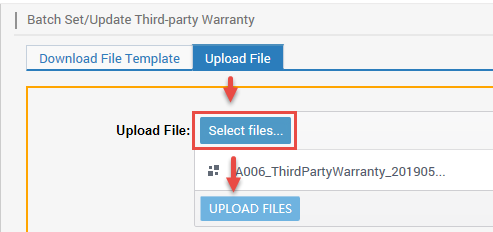
- Upload File tab selected.
- Click Select files… to upload the file from local drive.
- Click UPLOAD FILES.
- Uploaded File Status and History:
- Upload File tab selected under Uploaded File Status and History to check.
- By default, Newegg provides the last 3 days of upload. Adjust filter accordingly if checking for later days.
- Periodically click REFRESH LIST to update the Status.
- Status with Completed, Failed, or Completed with errors notices the upload has completed. Click View Details to check the reason for failed/error.


